Are you wondering how to fix an air mattress using a hot glue gun? Look no further! In this comprehensive guide, I will walk you through the process step by step. To fix an air mattress with a hot glue gun, it is crucial to ensure that the mattress is made from a sturdy material. Using a hot glue gun on a poorly constructed mattress could cause it to pop due to the heat breaking down the rubber’s elasticity.
To locate the leak in your air mattress, there are a couple of methods you can use. You can either submerge the mattress in water and look for bubbles or use a spray bottle to spray water and observe areas where it beads up. Once you have identified the leak, it’s time to clean the surrounding area using a cloth or sponge and water. This step is essential to ensure a strong bond when applying the hot glue.
Make sure to warm up the hot glue gun before applying the glue. Then, carefully apply a small drop of hot glue directly onto the leak, holding it down for about 15 seconds to allow it to dry. For larger tears, multiple drops of glue may be necessary. Apply the drops in a way that each overlaps slightly with the previous one, creating a stronger bond to seal the tear effectively.
After applying the glue, check for any additional leaks and repeat the process if necessary until no more air is leaking from the mattress. It is important to note that using a hot glue gun to fix an air mattress is a temporary solution. While it can provide a quick fix, it may not be as effective or long-lasting as using a patch kit or seeking professional repair.
So, if you find yourself in need of fixing an air mattress quickly, grab your hot glue gun and follow these step-by-step instructions. Just remember, it’s a temporary solution until you can implement a more permanent fix. Let’s get started!
Checking for Leaks
The first step in fixing an air mattress is to check for leaks. Here are two simple methods you can use to locate the leaks:
- Submerging the mattress in water: Fill a bathtub or large container with enough water to fully submerge the mattress. Carefully place the mattress into the water and observe for any air bubbles rising to the surface. These bubbles will indicate the location of the leak.
- Spraying the mattress with water: Fill a spray bottle with water and mist the surface of the mattress. Look for areas where the water beads up or forms small puddles. These spots are likely to be where the leak is located.
Once you have identified the leak, it’s time to move on to the next step in the repair process.
How to Fix an Air Mattress With a Hot Glue Gun?
Now that you have located the leaks in your air mattress, it’s important to prepare the surface before applying any glue. This will ensure that the glue adheres properly and creates a strong bond.
Clean the surrounding area of the leak using a damp cloth or sponge and water. Gently scrub the area to remove any dirt or debris. Allow the surface to dry completely before moving on to the next step.
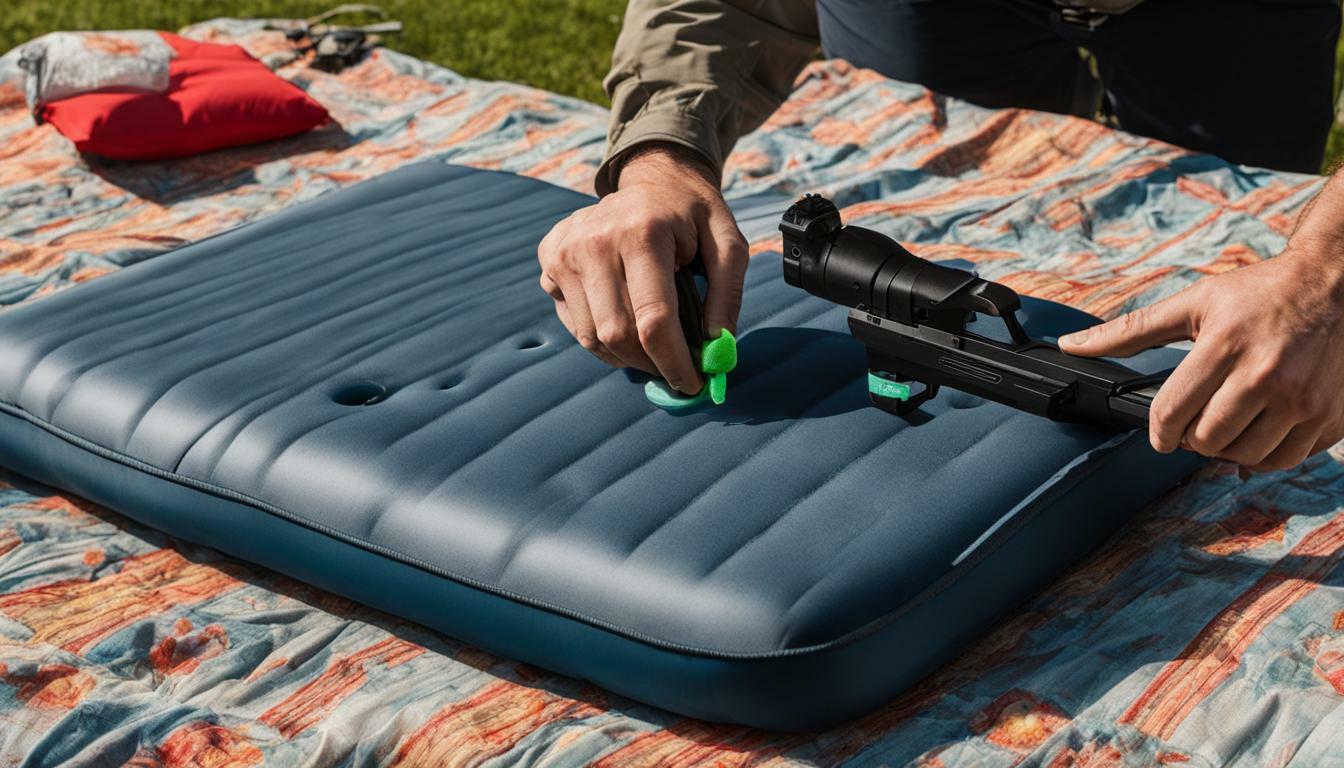
Once the surface is clean and dry, warm up your hot glue gun and ensure it is ready to use. With caution, apply a small drop of hot glue directly onto the leak, pressing it down gently with your finger or a tool. Hold it in place for about 15 seconds to allow the glue to dry and create a seal.
Note that for larger tears or holes in your air mattress, a single drop of glue may not be sufficient. In these cases, you may need to apply multiple drops of glue, ensuring that each drop overlaps slightly with the previous one. This will create a stronger bond and effectively seal the larger tear.
Remember, using a hot glue gun to fix an air mattress is a temporary solution. While it can provide a quick fix, it may not be as effective or long-lasting as using a patch kit or seeking professional repair. It is always a good idea to consider these options for a more permanent solution.
| Step | Method |
|---|---|
| 1 | Check for leaks by submerging the mattress in water or spraying it with water. |
| 2 | Locate the leaks by observing air bubbles or areas where water beads up. |
| 3 | Clean the surrounding area of the leak with a damp cloth or sponge. |
| 4 | Warm up the hot glue gun and apply a small drop of hot glue directly onto the leak. |
| 5 | Hold the glue in place for about 15 seconds to allow it to dry and create a seal. |
| 6 | For larger tears, apply multiple drops of glue, overlapping each other. |
Preparing the Surface
Before applying any glue, it is crucial to prepare the surface of the air mattress by cleaning the area around the leak. This step ensures that the glue adheres properly and creates a strong bond.
To clean the surface, grab a damp cloth or sponge and some water. Gently wipe down the area surrounding the leak, removing any dirt, debris, or oils that may prevent the glue from sticking. It’s important to be thorough in this cleaning process to ensure the best results.
Once the surface is clean, allow it to dry completely. This will help the glue adhere better and prevent any moisture from interfering with the repair. Patience is key here, as rushing the process could compromise the effectiveness of the repair.
Now that the surface is prepared, you’re ready to move on to the next step: using the hot glue gun to fix the air mattress. Follow the step-by-step instructions in the subsequent section to complete the repair process.
Using the Hot Glue Gun
It’s time to put that hot glue gun to use! Follow these steps to apply the glue to the air mattress and repair the leak.
- Prepare the hot glue gun: Before applying the glue, make sure your hot glue gun is warmed up and ready to use. This will ensure that the glue flows smoothly and adheres properly to the mattress.
- Apply a small drop of hot glue: Carefully squeeze a small amount of hot glue directly onto the leak. Be sure to apply the glue evenly and cover the entire area of the leak. Hold the glue down for about 15 seconds to allow it to dry and create a strong bond.
- Repeat if necessary: If the leak is not completely sealed after the first application, repeat the process and apply another small drop of hot glue. It may be necessary to apply multiple drops of glue to effectively seal larger tears or multiple leaks.
- Allow the glue to dry: After applying the glue, give it some time to dry completely. This will ensure that the repair is secure and that no air can escape from the mattress.
Using a hot glue gun to fix an air mattress can be a quick and effective solution, but it’s important to remember that it is temporary. While this method can provide a temporary fix, it may not be as long-lasting or reliable as using a patch kit or seeking professional repair. However, in a pinch, the hot glue gun method can buy you some time until a more permanent solution can be implemented.
| Pros | Cons |
|---|---|
| Quick and easy fix | Temporary solution |
| Requires minimal tools | May not be as effective on certain materials |
| Cost-effective | May not provide a completely airtight seal |
Remember, before attempting any repairs, it’s important to ensure that your air mattress is made from a sturdy material. Using a hot glue gun on a poorly constructed mattress could cause further damage. If you have any doubts or concerns about fixing your air mattress on your own, it is always best to seek professional assistance or consider using a patch kit for a more reliable and long-lasting repair.
Dealing with Larger Tears
If your air mattress has a larger tear or hole, don’t worry! Here’s how you can fix it using multiple drops of glue.
To begin, gather your hot glue gun and ensure it is heated and ready to use. It’s important to note that larger tears may require more glue to create a strong and effective seal. Apply the first drop of hot glue directly onto the tear, making sure to cover the entire area. Hold it down firmly for about 15 seconds, allowing the glue to dry and create a secure bond.
If the tear is particularly large, one drop of glue may not be enough. In this case, continue to apply multiple drops of glue, making sure each drop slightly overlaps with the previous one. This will create a layer of glue that reinforces the tear and provides a stronger seal. Be patient and take your time, ensuring that each drop adheres to the mattress surface properly.
Table: Recommended Steps for Fixing Larger Tears
| Step | Description |
|---|---|
| 1 | Ensure hot glue gun is heated |
| 2 | Apply first drop of hot glue onto tear |
| 3 | Hold down for 15 seconds |
| 4 | If tear is larger, apply multiple drops of glue |
| 5 | Ensure drops overlap for stronger seal |
Continue this process until no more air is leaking from the mattress. It’s important to note that using a hot glue gun is a temporary fix and may not be as effective or long-lasting as using a patch kit or seeking professional repair. However, fixing larger tears with multiple drops of glue can provide a quick and effective solution to extend the life of your air mattress.
Repeat if Necessary
Once you have completed the glue application, it’s important to check for any additional leaks and repeat the process if necessary. Even after sealing one leak, it’s possible that there may be other small tears or holes in your air mattress that you missed during the initial inspection. These additional leaks can cause the mattress to continue losing air and render the repair ineffective.
To ensure you have successfully fixed all the leaks, carefully examine the mattress surface and listen for any hissing sounds that could indicate air escaping. If you detect any new leaks, clean the area surrounding them and apply hot glue in the same manner as before. Remember to hold down each drop of glue for about 15 seconds to allow it to dry and form a strong bond.
List of Required Materials:
- A hot glue gun
- Hot glue sticks
- A cloth or sponge
- Water
Continue checking and repairing any additional leaks until the air mattress holds its inflation without any air loss. By being thorough in your inspection and repair process, you can ensure that your air mattress is fully sealed and ready to provide a comfortable night’s sleep.
Summary of the Glue Application Process:
| Step | Description |
|---|---|
| 1 | Locate the leaks by submerging the mattress in water or spraying it with water and looking for bubbles or areas where the water beads up. |
| 2 | Clean the surrounding area of the leak with a damp cloth or sponge and water. |
| 3 | Warm up the hot glue gun and apply a small drop of hot glue directly onto the leak, holding it down for about 15 seconds to allow it to dry. |
| 4 | For larger tears, apply multiple drops of glue, ensuring that each drop overlaps slightly with the previous one to create a stronger bond. |
| 5 | Check for additional leaks, clean the area, and repeat the glue application process if necessary. |
Temporary Fix
Keep in mind that using a hot glue gun to fix your air mattress is a temporary solution and may not provide a long-lasting repair. However, it can be a quick and easy way to patch up small leaks and extend the usability of your mattress until you can find a more permanent solution.
When using a hot glue gun, it is important to ensure that your air mattress is made from a sturdy material. Hot glue can generate heat that could potentially cause the mattress to pop if it is made from a low-quality or poorly constructed material. Always check the manufacturer’s instructions and specifications before attempting any repairs.
To effectively fix your air mattress, start by locating the leak. You can do this by either submerging the mattress in water and looking for bubbles or by spraying water on the mattress and observing areas where the water beads up. Once you have identified the leak, clean the surrounding area with a damp cloth or sponge and water to remove any dirt or debris that could interfere with the adhesive bond.
Next, warm up your hot glue gun and carefully apply a small drop of hot glue directly onto the leak. Hold it down firmly for about 15 seconds to allow the glue to dry and create a seal. For larger tears, you may need to apply multiple drops of glue, ensuring that each drop overlaps slightly with the previous one to create a stronger bond. Repeat the process if necessary to ensure a proper seal.
| Pros | Cons |
|---|---|
| Quick and easy temporary fix | May not provide a long-lasting repair |
| Cost-effective solution | Hot glue can generate heat |
| Can extend the usability of your mattress | Best for small leaks and tears |
While using a hot glue gun can be a practical solution to temporarily fix your air mattress, it is important to note its limitations. The hot glue may not hold up well over time, especially if the mattress is subjected to repeated use or pressure. It is always recommended to consider more permanent options, such as using a patch kit specifically designed for air mattresses, or seeking professional repair services for larger tears or extensive damage.
By being aware of the temporary nature of a hot glue gun repair and considering alternative options for a more durable fix, you can make an informed decision about how to effectively address the leaks in your air mattress.
Conclusion
In summary, using a hot glue gun is a convenient method to temporarily fix an air mattress. While it may not be as durable as other options, it can provide a quick solution in a pinch. When attempting this repair, it is crucial to ensure that your mattress is made from a sturdy material to prevent any further damage. By locating the leaks, cleaning the area, and applying hot glue with care, you can effectively seal the leaks and restore the functionality of your air mattress.
However, it is important to note that using a hot glue gun is only a temporary fix. The hot glue may not withstand heavy use or prolonged pressure, making it less durable compared to using a patch kit or seeking professional repair. For a more permanent solution, it is recommended to explore these alternatives.
In conclusion, while using a hot glue gun can be a quick and easy DIY method to fix an air mattress, it is crucial to assess the severity of the damage and consider the longevity of the repair. Always weigh the pros and cons before deciding on the most suitable solution for your air mattress repair needs.
FAQ
Q: Can I fix an air mattress with a hot glue gun?
A: Yes, you can temporarily fix an air mattress using a hot glue gun. However, it is important to note that this is not a long-term solution and may not be as effective as using a patch kit or seeking professional repair.
Q: How do I check for leaks in my air mattress?
A: To check for leaks, you can either submerge the mattress in water and look for bubbles or use a spray bottle to spray water on the mattress and look for areas where it beads up.
Q: What should I do before applying hot glue to the mattress?
A: Before applying hot glue, make sure to clean the surrounding area with a damp cloth or sponge and water. This will ensure that the glue adheres properly to the surface.
Q: How do I use a hot glue gun to fix an air mattress?
A: Warm up the hot glue gun and carefully apply a small drop of hot glue to the leak on the mattress, holding it for about 15 seconds to allow it to dry. For larger tears, multiple drops of glue may be required.
Q: What should I do if the tear in my air mattress is larger?
A: If the tear is larger, you may need to apply multiple drops of glue, ensuring that each drop overlaps slightly with the previous one. This will create a stronger bond and effectively seal the larger tear.
Q: Should I repeat the glue application process?
A: Yes, it is important to check for any additional leaks after applying the glue. Repeat the glue application process if necessary until no more air is leaking from the mattress.
Q: Is using a hot glue gun a permanent solution?
A: No, using a hot glue gun is a temporary fix for an air mattress. It is recommended to consider other options, such as using a patch kit or seeking professional repair, for a more permanent solution.
Q: What is the best way to fix an air mattress?
A: While using a hot glue gun can provide a temporary fix, the best way to fix an air mattress is to use a patch kit or seek professional repair. These methods will ensure a more effective and long-lasting solution.

- How to Turn off Deep Sleep Mode on Brother Printer Mfc-l2707dw? - October 25, 2023
- How to Tell if Your Girlfriend Used to Sleep Around? - October 25, 2023
- How to Get My Cat to Sleep? - October 25, 2023